You have a way for website visitors to contact you, right? Perhaps a contact form? Excellent. Today I want to show you how to create a redirect so that when a visitor fills out the form, they’re automatically sent to a thank you page. (It sounds a bit complicated, but I promise, it’s not.)
But wait, why should you do this? Why isn’t the message “form submitted successfully” enough?
Because you’re ready to go to the next level and engage your visitor even more. You know that you need to make your site as user friendly and easy to understand as possible and you definitely don’t want to leave your visitor hanging. You want to continue to engage with them for as long as possible, guiding them through your website and giving them ample opportunity to get to know you and to get their questions answered.
Let’s get started.
Create a new page
Create a new page titled Thank You.
Take a look at the list below and include whatever makes sense for you and your business. Think about your goals for the site — what do you want your visitor to do after they fill out your contact form?
- Be helpful. Include a short sentence thanking the person for filling out the form, information on what will happen next and when they can expect to hear from you
- Then, include:
- A way to schedule a call or request a quote
- How to follow you on social media
- A list of recent blog posts
- A way to sign up for your newsletter or email list
You don’t have to include all of the above — just a few options to engage your visitor a bit more.
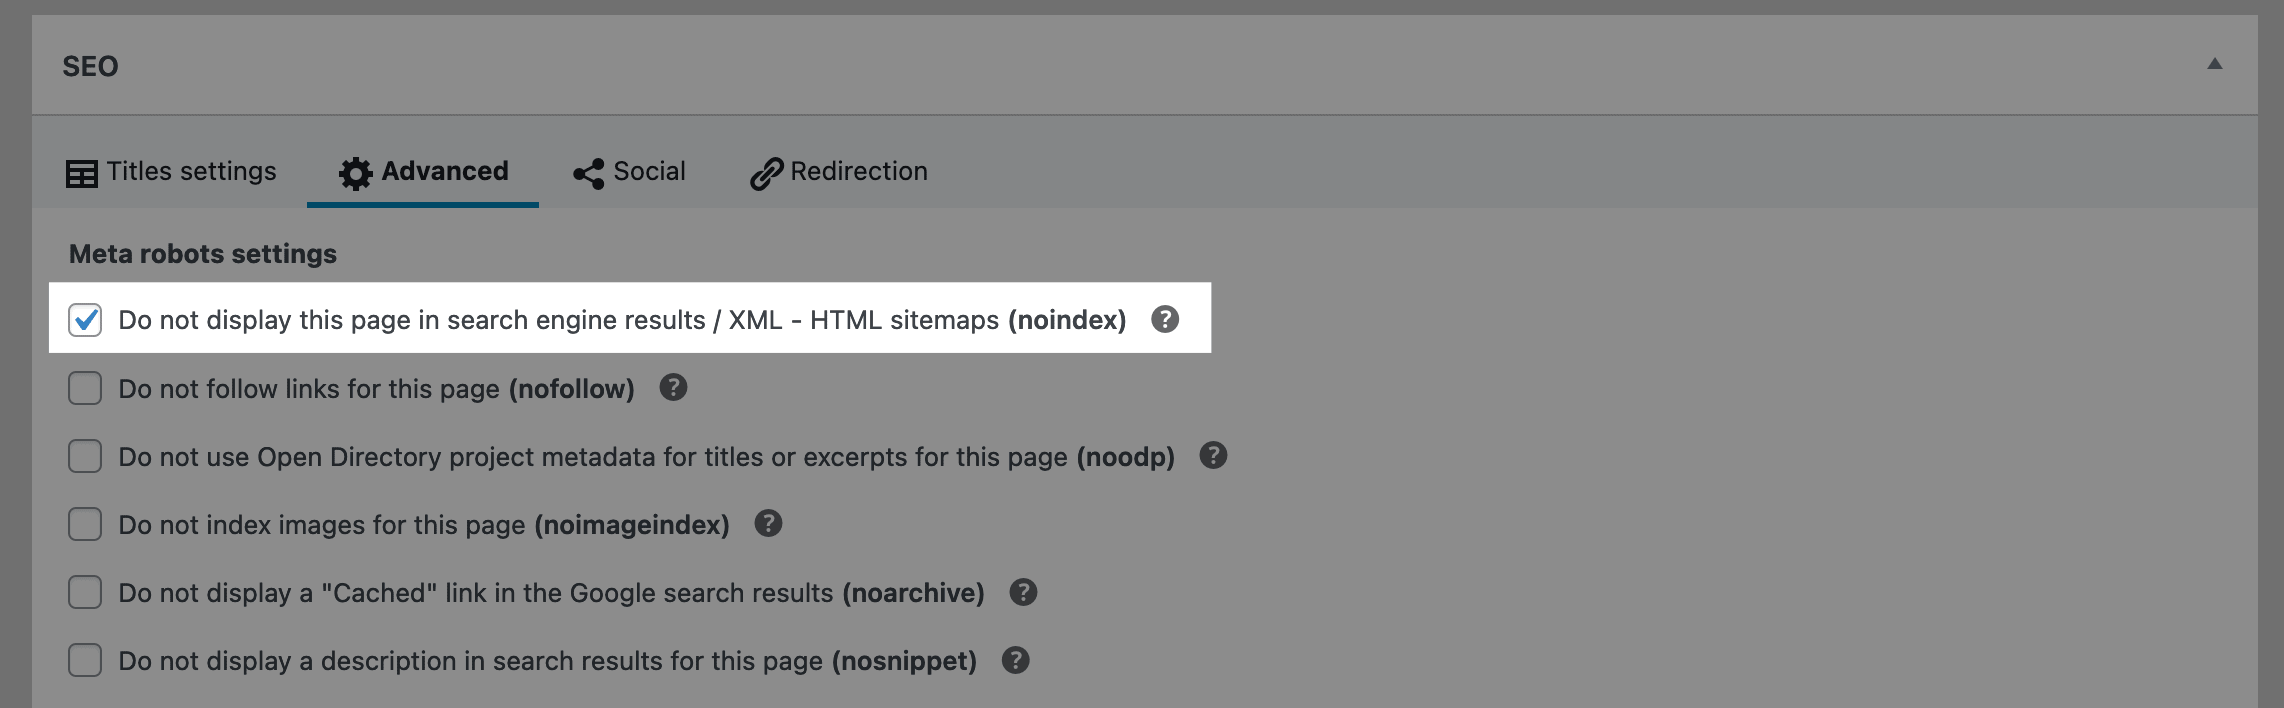
Noindex
Since you don’t want this page to show up in search results, add noindex.
If you’re using Yoast, go to SEO, Advanced and choose No under Allow search engines to show this Page in search results.

If you’re using SEOPress, go to Advanced and under the Meta robots settings, check Do not display this page in search results / XML – HTML sitemaps (noindex).
Adding the redirect
Now go to your contact form. Depending on the contact form plugin you’re using, the steps will be different.
Gravity Forms
If you’re using Gravity Forms, check under Settings, Confirmations. Choose Redirect, then enter the link to your thank you page under Redirect URL.

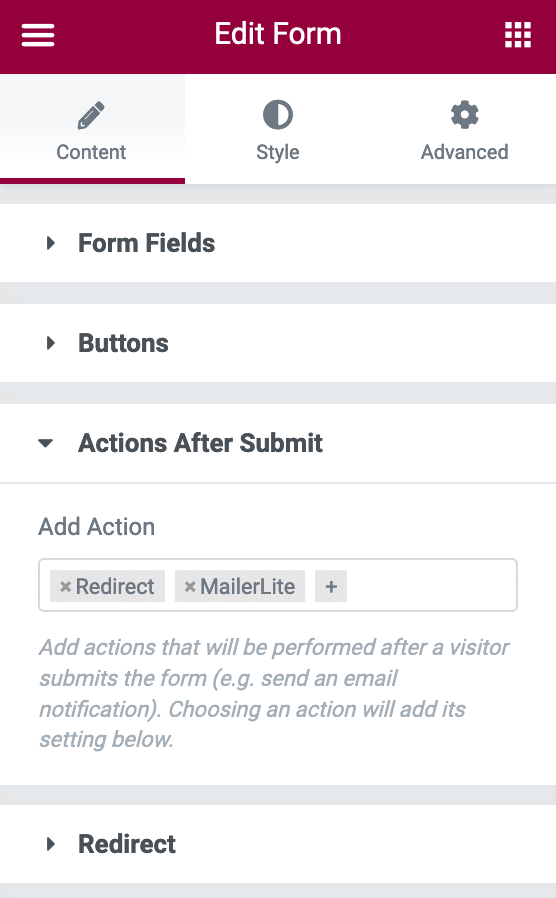
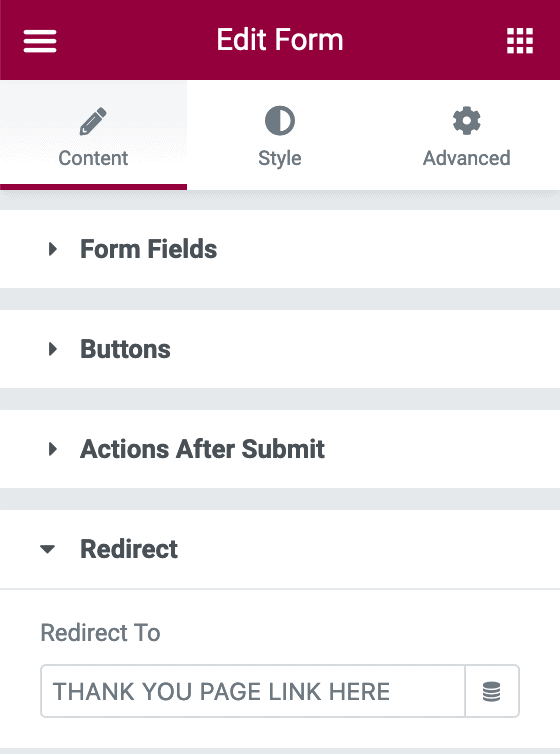
Elementor Forms
If you have Elementor Pro and are using their built-in forms, choose the Redirect action under Actions After Submit. After that, you’ll see a new option for Redirect where you can enter the link to your thank you page.
Other Forms
There are a ton of other great form plugins for WordPress. Here’s how to redirect in each:
Now test it out! Go to your contact page and fill out and submit the form. Are you redirected? Great! See how easy that was?
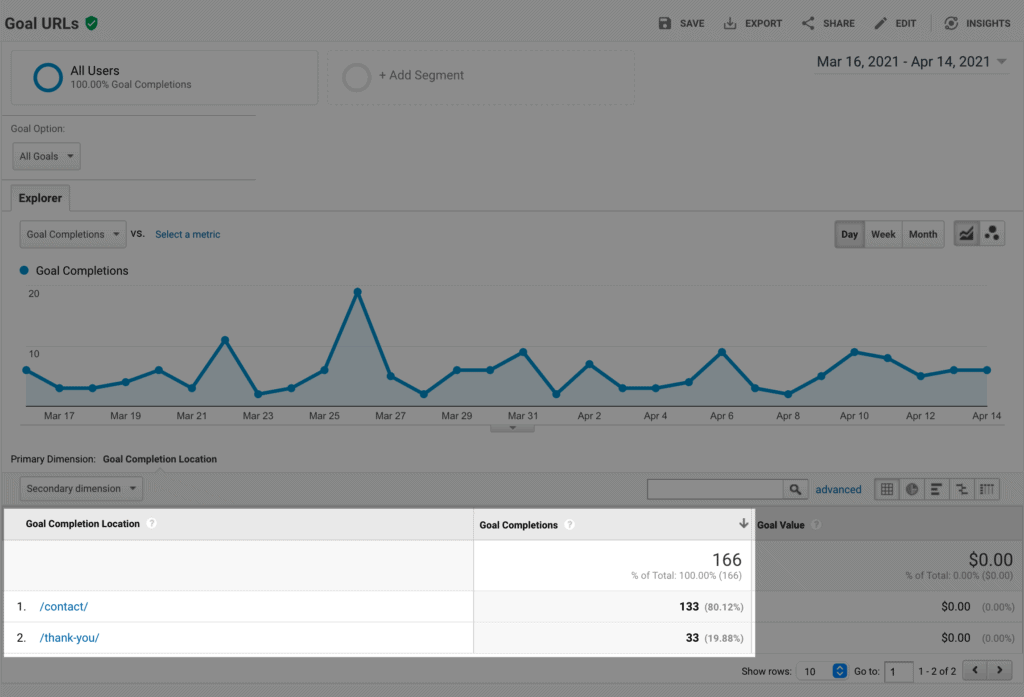
Bonus: Goals in Analytics
If you’re using Universal Analytics on your site, you can easily create a goal for visits to your contact and subsequent thank you page.
Visit Conversions, Goals, Goal URLs and add the links to your contact and thank you pages. Check back after again in a few weeks to see your conversions.